之前提到的声明式并发模型中, 线程之间无法交换数据, 这限制了线程的应用. 为了解决这一问题, Hoare在1978年的论文中提出了“Communicating Sequential Processes”模型, 简称CSP模型. 该模型通过线程间消息传递机制来解决并发中的问题, 因此也被称为消息传递(message passing)模型. 本文不再介绍早期模型的具体形式, 而重点说明其当下最流行的形态——channel, 并以Go语言中的channel作为示例进行说明. 以下内容中, goroutine与线程两个术语将不加区分使用.
Tony Hoare, 1980年图灵奖得主
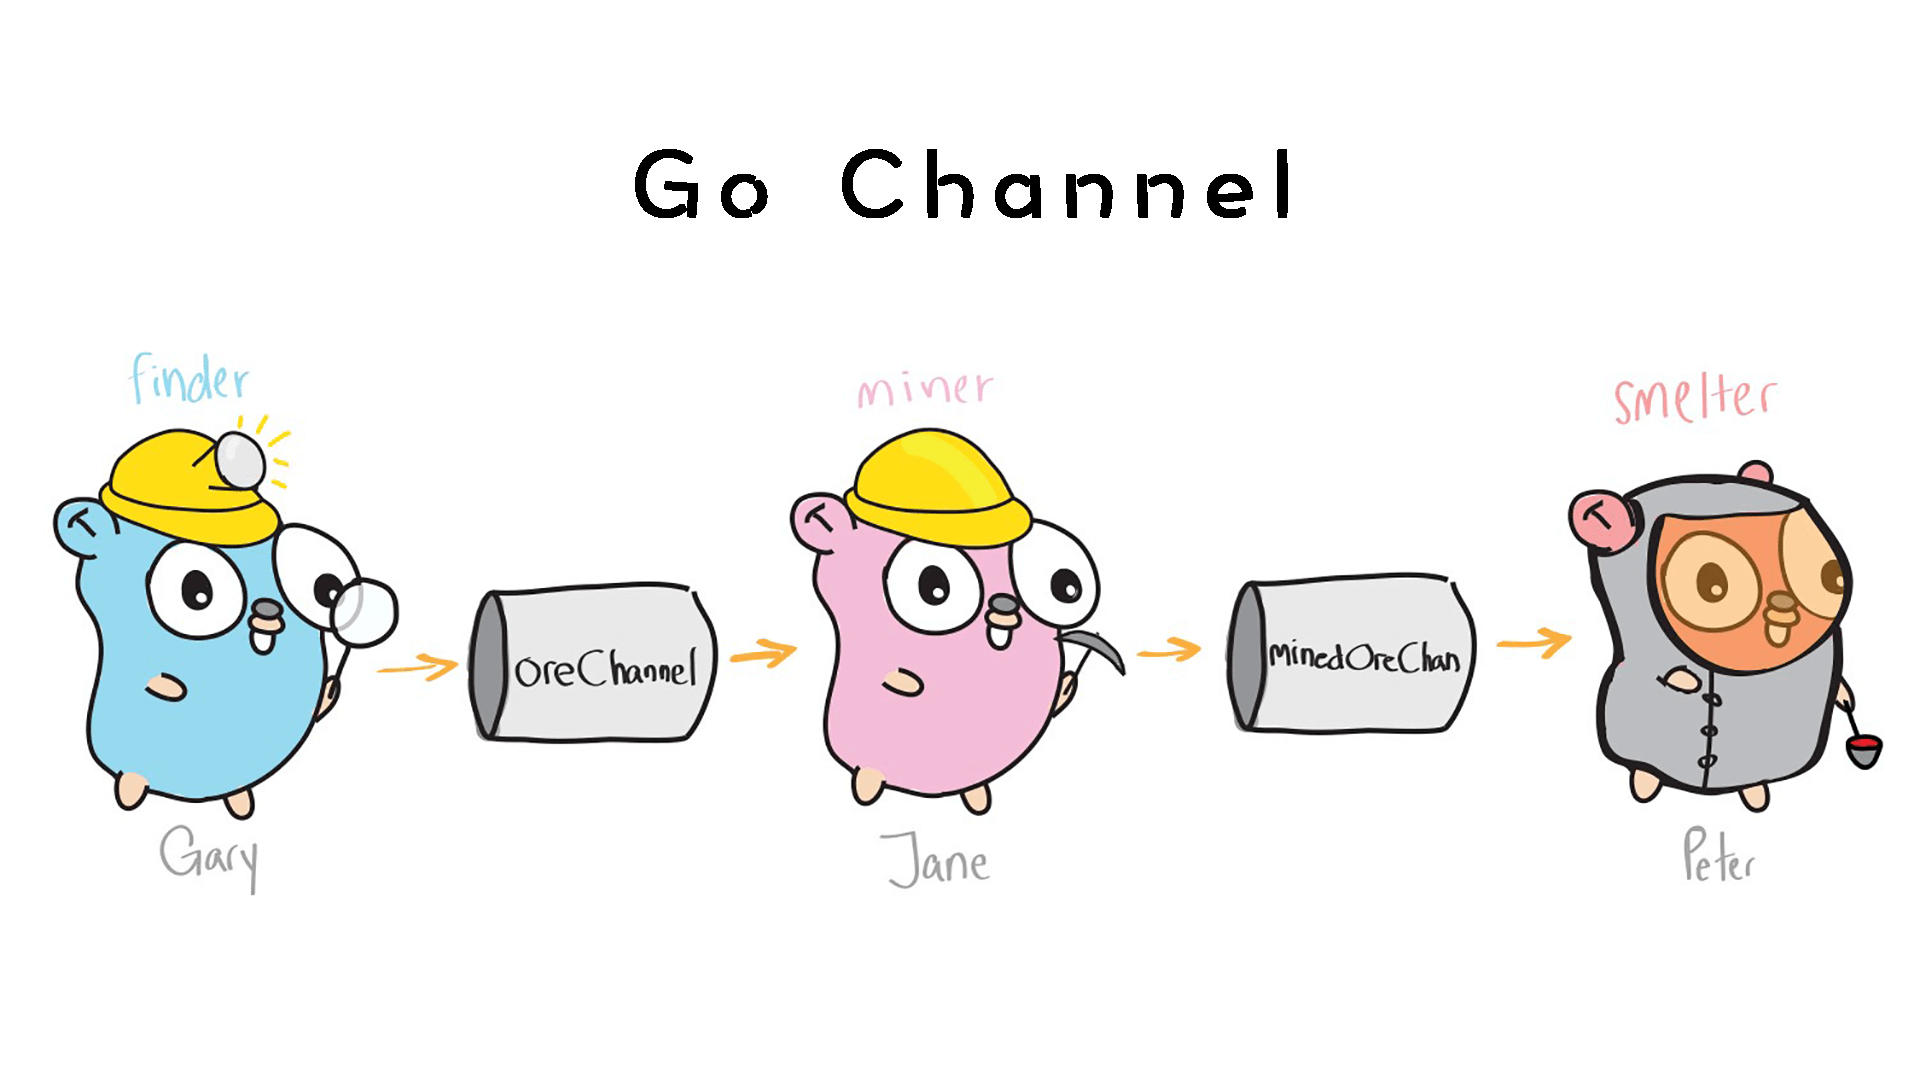
CSP的现代形态--channel
CSP Model带来的新特性
消息传递模型在声明式并发模型之上增加了两个新特性--channel和select.
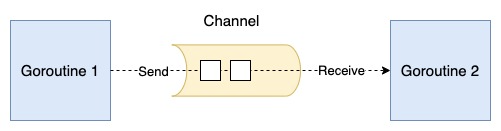
Channel
channel_在行为上_类似一个原子队列, 你可以将数据对象放入channel, 也可以从channel中取出数据, 甚至channel还有容量的概念. 从_对象的角度_来看, 它是一等公民对象, 可以传递到程序的各个角落, 放入容器, 甚至嵌套放入另一个channel中, 且无需担心复制带来的开销.
channel具有以下几个主要特性:
读写操作均为原子化, 因此无需担心数据竞争, 数据的读写是顺序的.channel具有容量, 容量表示channel能够缓存的消息数量. 默认容量为0. 即无缓存.channel可以控制线程的挂起与恢复. 从空channel中读取数据会挂起线程, 直到channel中有数据时恢复运行;同理, 向已满的channel写入数据也会挂起线程, 直到channel有空间时恢复运行. 对于容量为0的channel, 任何写入都会挂起, 任何读取也会挂起, 只有读写双方同时存在时才能交换数据, 这实现了两个线程读写的同步.- channel可以被关闭. 关闭channel表示线程希望结束通信.
关闭后的channel不能写入, 只能读取. 即使在channel关闭后仍有未读数据, 数据也不会丢失, 仍可按原样读取;数据读取完毕后, 再次读取将得到该类型的默认值, 例如int类型读取为0.
| ⛔ Closed Channel | ↗️ Active Channel | |
|---|---|---|
| Close | panic | Succeed to close |
| Send value to | panic | Block or succeed to send |
| Receive value from | Never block | Block or succeed to receive |
设想两个线程启动时共享同一个channel, 一个线程写入数据, 另一个线程读取数据. 这样自然实现了数据传递, 且不存在竞态条件, 从而避免了数据错误等问题.
1 2 3 4 5 6 7 8 9 10 11 12 13 14 15 16 17 18 19 20 21 22 23 24 25 26 27 28 29 30 31 32 33 34 35 36 37 38 39 40 41 42 43 44 45 46 47 48 49 50 51package main import ( "fmt" "time" ) func main() { // 无缓冲区的channel (容量为0) ch1 := make(chan int) go func() { // 运行这一句时线程会阻塞, 只有当ch1被读取时, 42才被成功传递 ch1 <- 42 }() fmt.Println("Received from ch1:", <-ch1) // 有缓冲区的channel, 缓冲区容量为2 ch2 := make(chan string, 2) ch2 <- "hello" ch2 <- "world" // ch2 <- "!" // 若执行则会阻塞 fmt.Println("Received from ch2:", <-ch2) fmt.Println("Received from ch2:", <-ch2) // 关闭channel ch3 := make(chan int, 1) ch3 <- 100 close(ch3) // 从已关闭的channel中收取数据, 当数据全部取出后, 再取则会得到默认值 for v := range ch3 { fmt.Println("Received from closed ch3:", v) } // 取值时感知channel是否被关闭 ch4 := make(chan int) go func() { time.Sleep(time.Second) close(ch4) }() v, ok := <-ch4 if !ok { fmt.Println("ch4 is closed, no more data") } else { fmt.Println("Received from ch4:", v) } }
Select
第二个特性select, select是一个关键词, 其灵感来自操作系统的IO多路复用.它能够并联若干条channel. 一旦任意一条能够被读出, 或者被写入, 就会进入相应的分支中执行相应的代码, 如果没有任何可操作的channel, 它就会挂起或者执行默认操作.
这个特性很强, 他可以让每个线程都化身为一个迷你服务, 提供监听, 线程管理, 流水线聚合等能力.
1 2 3 4 5 6 7 8 9 10 11 12 13 14 15 16 17 18 19 20 21 22 23 24 25 26 27 28 29 30 31 32 33 34 35 36 37package main import ( "fmt" "time" ) func main() { ch1 := make(chan string) ch2 := make(chan string) // 经过一定延迟再发送信息 go func() { time.Sleep(1 * time.Second) ch1 <- "message from ch1" }() go func() { time.Sleep(2 * time.Second) ch2 <- "message from ch2" }() for i := 0; i < 2; i++ { // 并联ch1, ch2和timeout channel select { case msg1 := <-ch1: fmt.Println("Received:", msg1) case msg2 := <-ch2: fmt.Println("Received:", msg2) case <-time.After(3 * time.Second): { fmt.Println("Timeout: no message received") break } } } }
怎么使用 Channel 和 Select
这两个概念不难理解, 但在实战中, channel 和 select 如何使用呢?
首先说说用法. 除了上面代码示例中的使用方式外, channel和select还有几个经典的使用模式.
首先是创建线程的经典模式.
Channel Owner
第一种经典写法是封装channel创建和对应channel的管理.
在大多数应用中, goroutine创建后, 总会通过channel传出自己计算的结果. 那么谁来管理这些channel? 或者换句话说, 计算完成后谁来关闭这些channel? \
我们通常认为, 哪个goroutine向channel提供数据, channel就归谁管理. 因此, 我们将创建channel和创建goroutine封装在一起, 当goroutine结束时, channel也随之关闭.
1 2 3 4 5 6 7 8 9 10 11 12 13 14 15 16 17 18 19 20 21 22 23 24 25 26 27 28 29 30 31package main import "fmt" func chanOwner() <-chan int { results := make(chan int, 5) go func() { // 当前goroutine负责关闭results这个channel defer close(results) for i := 0; i <= 5; i++ { results <- i } }() return results } func consumer(results <-chan int) { for result := range results { fmt.Printf("Receive: %d\n", result) } fmt.Printf("Done receiving") } func main() { // 通过调用chanOwner来启动goroutine, 并返回其输出的channel results := chanOwner() consumer(results) }
该例子来自[1]
Managing Channel
第二种经典写法是, 我们使用channel来管理goroutine.
一般goroutine有两种行为模式, 一种是完成一定工作就结束退出, 一种是不断监听输入channel, 一旦有数据可取, 就执行相应操作.
对于第二种行为模式, 我们会希望能够控制goroutine, 使其结束监听. 这里我们使用channel, 让其传递结束信号来实现这一点.
在实现时, 除了输入数据用的channel, 我们还需要另一个输入控制信号的channel. 只需用select将数据和控制的channel并联起来, 正如例子中所示, 在其他线程中, 一旦向done channel发送任意值或关闭done channel, 都会使该goroutine退出.
1 2 3 4 5 6 7 8 9 10 11 12 13 14 15 16 17 18 19 20 21 22 23 24 25 26 27 28 29 30 31 32 33 34 35 36 37 38 39 40 41 42 43package main import ( "fmt" "time" ) // done是控制信号channel, 类型是interface{}, 意味着控制信号是什么类型都可以 func doWork( done <-chan interface{}, strings <-chan string, ) <-chan interface{} { // terminated这个channel用来展示goroutine的存活状态 terminated := make(chan interface{}) go func() { defer fmt.Println("doWork exits") defer close(terminated) for { select { case s := <-strings: fmt.Println(s) case <-done: // 通过select并联数据和控制channel, 来实现控制退出 return } } }() return terminated } func main() { done := make(chan interface{}) input1 := make(chan string) input2 := make(chan string) terminated1 := doWork(done, input1) doWork(terminated1, input2) // 这里启动了两个goroutine, 第一个退出, 第二个也要退出 close(done) time.Sleep(1 * time.Second) }
该例子来自[1]
CSP模型可以实现哪些功能或应用?
比较常见的有2种应用: 流水线和管理线程
流水线
第一种是构建流水线(pipeline).
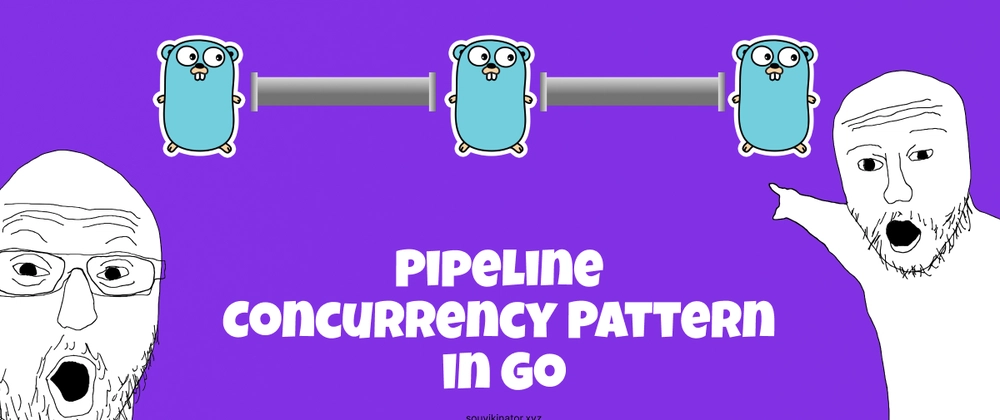
如果将一个计算拆分为若干步骤, 每个步骤写成一个函数, 并放入goroutine中不断循环执行. 数据从一个goroutine传入, 处理后输出给另一个goroutine, 这样就组成了流水线.

每个步骤可以串联起来, 甚至可以实现fan-out或fan-in, 以此构建更复杂的流水线.
1 2 3 4 5 6 7 8 9 10 11 12 13 14 15 16 17 18 19 20 21 22 23 24 25 26 27 28 29 30 31 32 33 34 35 36 37 38 39 40 41 42 43 44 45 46 47 48 49 50 51 52 53 54 55 56 57 58 59 60 61 62 63 64 65 66 67 68 69 70 71 72 73package main import ( "context" "fmt" ) // Stage 1: 输出nums中的数字 // 这里ctx可以理解为是对控制channel的封装 // 一般我们使用context而不是使用自己封装的控制channel func gen(ctx context.Context, nums ...int) <-chan int { out := make(chan int) go func() { defer close(out) for _, n := range nums { select { case <-ctx.Done(): return case out <- n: } } }() return out } // Stage 2: 求平方 func sq(ctx context.Context, in <-chan int) <-chan int { out := make(chan int) go func() { defer close(out) for n := range in { select { case <-ctx.Done(): return case out <- n * n: } } }() return out } // Stage 3: 数字转换成string func toString(ctx context.Context, in <-chan int) <-chan string { out := make(chan string) go func() { defer close(out) for n := range in { select { case <-ctx.Done(): return case out <- fmt.Sprintf("Result: %d", n): } } }() return out } func main() { ctx, cancel := context.WithCancel(context.Background()) defer cancel() numbers := gen(ctx, 2, 3, 4, 5) squares := sq(ctx, numbers) results := toString(ctx, squares) for r := range results { fmt.Println(r) // 额外控制条件, 如果结果为9, 则停止流水线 if r == "Result: 9" { cancel() } } }
1 2 3 4 5 6 7 8 9 10 11 12 13 14 15 16 17 18 19 20 21 22 23 24 25 26 27 28 29 30 31 32 33 34 35 36 37 38 39 40 41 42 43 44 45 46 47 48 49 50 51 52 53 54 55 56 57 58 59 60 61 62 63 64 65 66 67 68 69 70 71 72 73 74 75 76 77 78 79 80 81 82 83 84 85 86 87 88 89 90 91 92 93 94 95 96 97 98 99 100 101 102 103 104package main import ( "context" "fmt" "sync" "time" ) // Stage 1: 输出nums中的数字 func gen(ctx context.Context, nums ...int) <-chan int { out := make(chan int) go func() { defer close(out) for _, n := range nums { select { case <-ctx.Done(): return case out <- n: } } }() return out } // 定义做平方的worker func sqWorker(ctx context.Context, in <-chan int) <-chan int { out := make(chan int) go func() { defer close(out) for n := range in { select { case <-ctx.Done(): return case out <- n * n: // 模拟真实场景, 让worker做完一个计算就挂起一段时间 time.Sleep(100 * time.Millisecond) } } }() return out } // Stage 2: fan-out, 把stage1的随机数给到多个sqWorker, 他们彼此独立工作, 最终(无序的)输出所有结果 func sq(ctx context.Context, in <-chan int, workerCount int) <-chan int { out := make(chan int) var wg sync.WaitGroup wg.Add(workerCount) // 创建多个sq goroutine for i := 0; i < workerCount; i++ { workerOut := sqWorker(ctx, in) // 多个goroutine从同一个in channel中读取数据 // 将结果转发到out channel go func() { defer wg.Done() for n := range workerOut { select { case <-ctx.Done(): return case out <- n: } } }() } // 当所有worker完成工作后关闭out go func() { wg.Wait() close(out) }() return out } // Stage 3: 转换成字符串 func toString(ctx context.Context, in <-chan int) <-chan string { out := make(chan string) go func() { defer close(out) for n := range in { select { case <-ctx.Done(): return case out <- fmt.Sprintf("Result: %d", n): } } }() return out } func main() { ctx, cancel := context.WithCancel(context.Background()) defer cancel() numbers := gen(ctx, 2, 3, 4, 5, 6, 7, 8) // Fan-out with 3 workers squares := sq(ctx, numbers, 3) results := toString(ctx, squares) for r := range results { fmt.Println(r) } }
1 2 3 4 5 6 7 8 9 10 11 12 13 14 15 16 17 18 19 20 21 22 23 24 25 26 27 28 29 30// 这里fan-in和fan-out一样, 都是pipeline其中的一环 // Fan-in: 聚合多个channel的结果 func fanIn(ctx context.Context, chans ...<-chan int) <-chan int { var wg sync.WaitGroup out := make(chan int) output := func(c <-chan int) { defer wg.Done() for n := range c { select { case <-ctx.Done(): return case out <- n: // 由c转发到out } } } wg.Add(len(chans)) for _, c := range chans { // 对每个channel都启动一个转发用的goroutine go output(c) } go func() { wg.Wait() close(out) }() return out }
管理线程
第二种应用涉及goroutine之间的管理. 例如, 总有一些goroutine会因各种原因报错并关闭, 此时需要一个supervisor goroutine来管理其他worker goroutine, 监听它们是否存活. 如果失活, 则由supervisor重启这些worker.
1 2 3 4 5 6 7 8 9 10 11 12 13 14 15 16 17 18 19 20 21 22 23 24 25 26 27 28 29 30 31 32 33 34 35 36 37 38 39 40 41 42 43 44 45 46 47 48 49 50 51 52 53 54 55 56 57 58 59 60 61 62 63 64 65 66 67 68 69 70 71 72 73 74 75 76 77 78 79 80 81 82 83 84 85 86 87 88 89 90 91 92 93 94 95 96 97 98 99 100 101 102 103 104 105 106 107 108 109 110 111 112 113 114 115 116 117 118 119 120 121package main import ( "context" "fmt" "sync" "time" ) // Worker模拟一个工作goroutine, 定期发送心跳. // 它会在一段时间后“死亡”, 停止发送心跳. func worker( ctx context.Context, id int, heartbeatInterval time.Duration, heartbeat chan<- int, ) { defer fmt.Printf("Worker %d 停止了\n", id) ticker := time.NewTicker(heartbeatInterval) defer ticker.Stop() // 模拟工作goroutine在一段时间后死亡 deathTimer := time.NewTimer(5 * time.Second) defer deathTimer.Stop() for { select { case <-ctx.Done(): return case <-deathTimer.C: // 工作goroutine“死亡”, 通过返回停止发送心跳 fmt.Printf("Worker %d 死亡了\n", id) return case <-ticker.C: select { case heartbeat <- id: // 发送心跳 case <-ctx.Done(): return default: // 即使没有supervisor在监听心跳, 也不应该阻塞整个工作goroutine, 所有增加default } } } } // Supervisor监听工作goroutine的心跳, 如果某个工作goroutine停止发送心跳, 则重启它. func supervisor( ctx context.Context, workerCount int, heartbeatInterval time.Duration, ) { heartbeat := make(chan int) var wg sync.WaitGroup // 启动工作goroutine startWorker := func(id int) context.CancelFunc { workerCtx, cancel := context.WithCancel(ctx) wg.Add(1) go func() { defer wg.Done() worker(workerCtx, id, heartbeatInterval, heartbeat) }() return cancel } // 记录取消函数以便重启工作goroutine cancelFuncs := make(map[int]context.CancelFunc) for i := 1; i <= workerCount; i++ { cancelFuncs[i] = startWorker(i) } // 记录每个工作goroutine最后一次心跳时间 lastHeartbeat := make(map[int]time.Time) for i := 1; i <= workerCount; i++ { lastHeartbeat[i] = time.Now() } checkInterval := heartbeatInterval * 2 ticker := time.NewTicker(checkInterval) defer ticker.Stop() for { select { case <-ctx.Done(): // 取消所有工作goroutine for _, cancel := range cancelFuncs { cancel() } wg.Wait() fmt.Println("Supervisor 停止了") return case id := <-heartbeat: // 更新最后一次心跳时间 lastHeartbeat[id] = time.Now() fmt.Printf("Supervisor: 收到来自工作goroutine %d 的心跳\n", id) case <-ticker.C: // 检查哪些工作goroutine错过了心跳 now := time.Now() for id, last := range lastHeartbeat { if now.Sub(last) > checkInterval { fmt.Printf("Supervisor: 工作goroutine %d 未收到心跳, 正在重启\n", id) // 取消旧工作goroutine并启动新工作goroutine cancelFuncs[id]() // 取消旧的 cancelFuncs[id] = startWorker(id) lastHeartbeat[id] = time.Now() // 重置重启后心跳时间 } } } } } func main() { ctx, cancel := context.WithCancel(context.Background()) defer cancel() go supervisor(ctx, 3, 1*time.Second) // 让程序运行15秒 time.Sleep(15 * time.Second) fmt.Println("主程序: 停止运行") }

每个worker需额外返回一个心跳channel, 并定期发送心跳信号. supervisor设定计时器, 只要在计时器结束前收到心跳, 即认为worker正常;反之, 则杀死(关闭)旧的worker并启动新的worker.
Concurrency in go, 作者Katherine Cox-Buday, 2017出版